Create a work item
- 01
Open the Action Board
Confirm the workspace and the board view.
- 02
Choose the level
Select the level that matches the planning scope — an epic for a capability, a story for a unit of delivery.
- 03
Enter details
Provide the fields exposed by your release and workspace configuration.
- 04
Save and verify
Confirm the item's lifecycle stage, ownership, and initial gate state.
Work the review queue
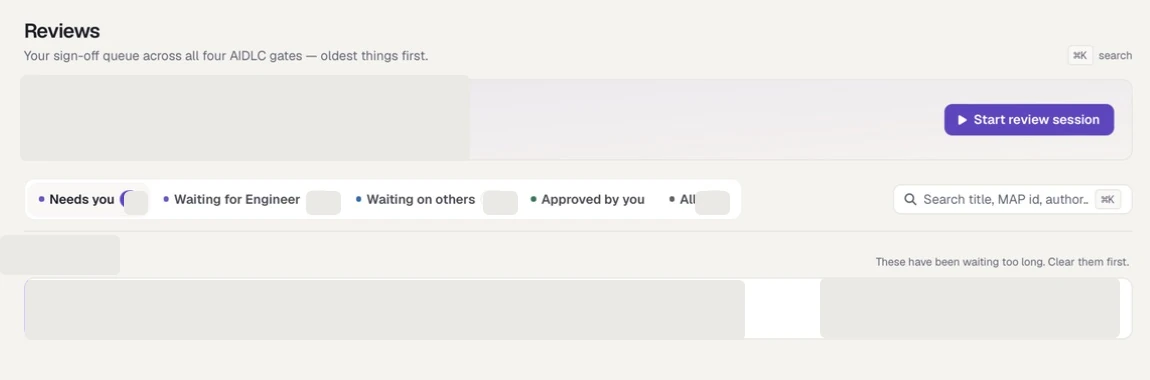
The queue separates reviews that need you, match your persona, wait on others, or were already approved. Work-item names, people, dates, and live totals are masked.
- 01
Open Reviews
The queue splits into tabs by who must act.
- 02
Start with Needs you
These are slots that name you specifically. The count at the top is what is waiting on you.
- 03
Check Waiting for your persona
These are unfilled pool slots your persona could satisfy. Any eligible person can take one.
- 04
Leave Waiting on others alone
These are tracked for awareness; no action is needed from you.
Approve or reject a gate
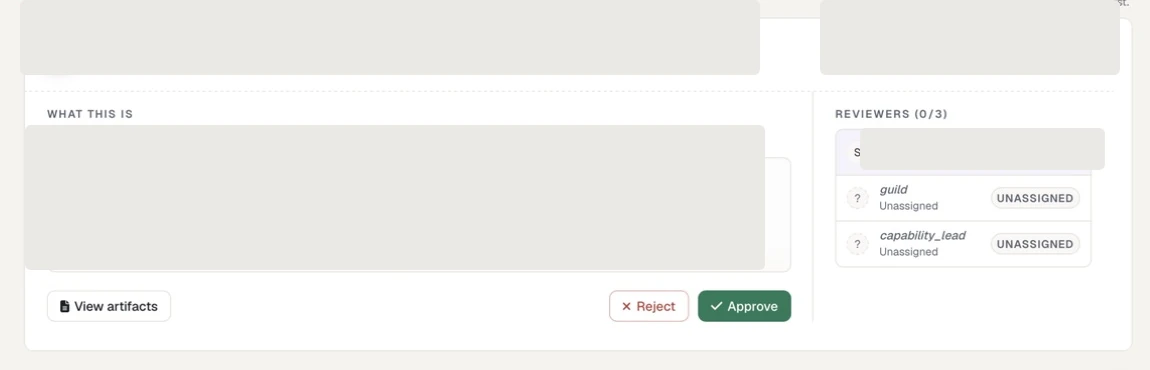
A gate review keeps the evidence action, reviewer slots, and decision controls together. Internal work-item content and member identity are masked.
- 01
Open the review
Use the review queue, or open the gate from the work item.
- 02
Inspect evidence
Review the required artefacts, comments, and current work-item context.
- 03
Check your slot
Confirm whether your decision is required or optional, and whether the slot is strict or a pool.
- 04
Decide
Approve, or reject with a specific reason and the expected remediation.
- 05
Verify status
Confirm the gate and the card indicators reflect the decision.
Connect Jira and view a ticket
- 01
Confirm enablement
Ask an administrator to verify that Jira synchronisation is enabled for the workspace.
- 02
Connect your credential
Open your member connection settings and choose the connection type your Jira deployment uses: - Jira Cloud — enter the Atlassian site URL, your account email, and an API token. - Jira on-premises — enter the server URL and the username/password credentials accepted by that deployment. Use your own Jira identity. Keep the credential fields out of screenshots, support bundles, work-item descriptions, and documentation examples. MSOCK's backend never holds a Jira credential — the desktop application fetches with yours.
- 03
Link the ticket
Link or display one Jira ticket at a time.
- 04
Review read-only context
Jira data flows one way, into MSOCK. Manual resynchronisation is limited to once every 30 seconds.
Switch board views
| View | Best for |
|---|---|
| Kanban | Flow and stage-by-stage status |
| List | Scanning details and sorting a bounded set of work |
| Timeline | Sequencing and date-oriented planning |
| Swimlanes | Comparing work across owners or categories |
| Grouped | Summarising work by a shared attribute |
Raise a knowledge contribution or friction report
Contributions collects knowledge the team proposes adding. Use the status filter to focus the queue, open a contribution to review its evidence and context, and update its status as it moves through triage. Contributions feed the maintainer's /ws-triage queue.
To report friction:
1. Open Knowledge → Friction and start a report. 2. Choose the lifecycle command and category that best locate the problem. 3. Enter the affected service, up to 60 characters. 4. Choose Low, Medium, or High severity. 5. Describe what happened in 10–2,000 characters, including the expected outcome and where the workflow stopped. 6. Add an optional workaround, up to 1,000 characters, when one is known. 7. Submit, then use the Friction feed to follow triage.
Do not put credentials, customer data, or other restricted content in the description or workaround.